Category: howto

  • How to Manage Windows Defender Exclusions

    Many newer forms of malware are adding an exclusion into Windows Defender when they initially bypass the antivirus. This is to prevent its detection and removal for when Windows Defender catches on and updates their virus signatures. It assumes the user manually added it.

    After you’ve cleaned the system from any malware, it’s a good idea to remove any exclusions you don’t recognize.

    Here’s a guide on how to manage Windows Defender exclusions:

    Click the Start button / Windows logo on your Taskbar:

    Select Settings:

    Click Privacy & security:

    Click Windows Security:

    Choose Open Windows Security:

    Choose Virus & threat protection:

    Choose Manage Settings:

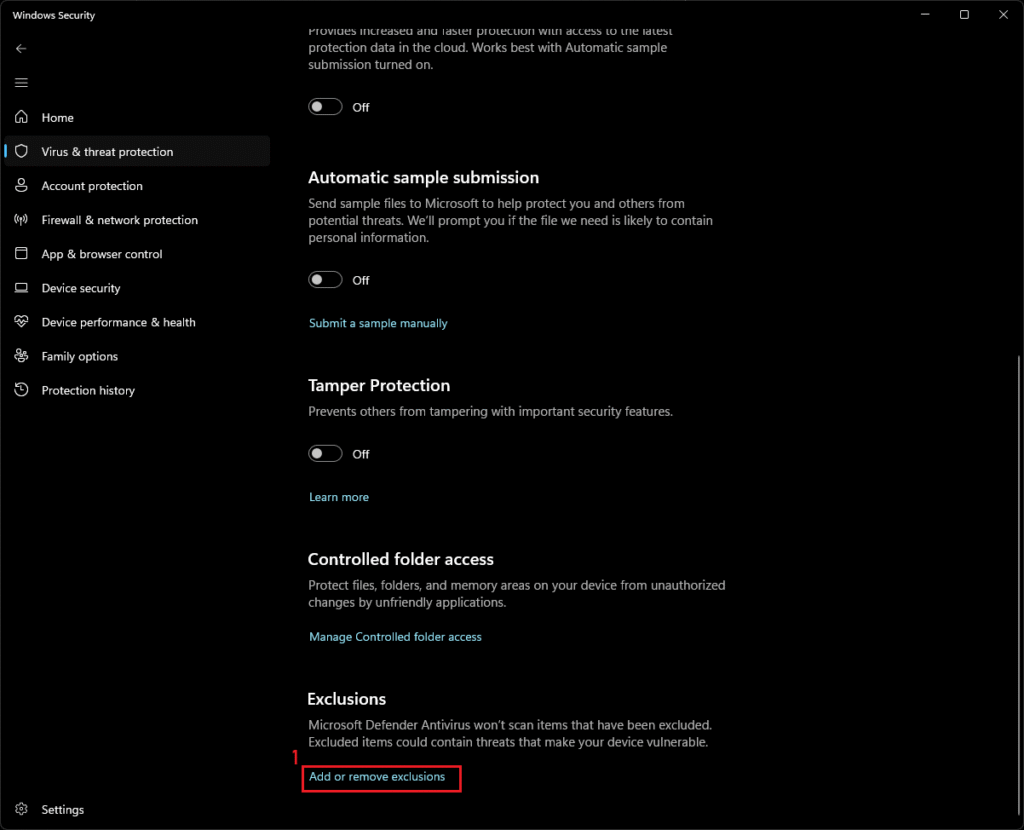
    Scroll down towards the bottom of this page until you find Exclusions. Select Add or remove exclusions

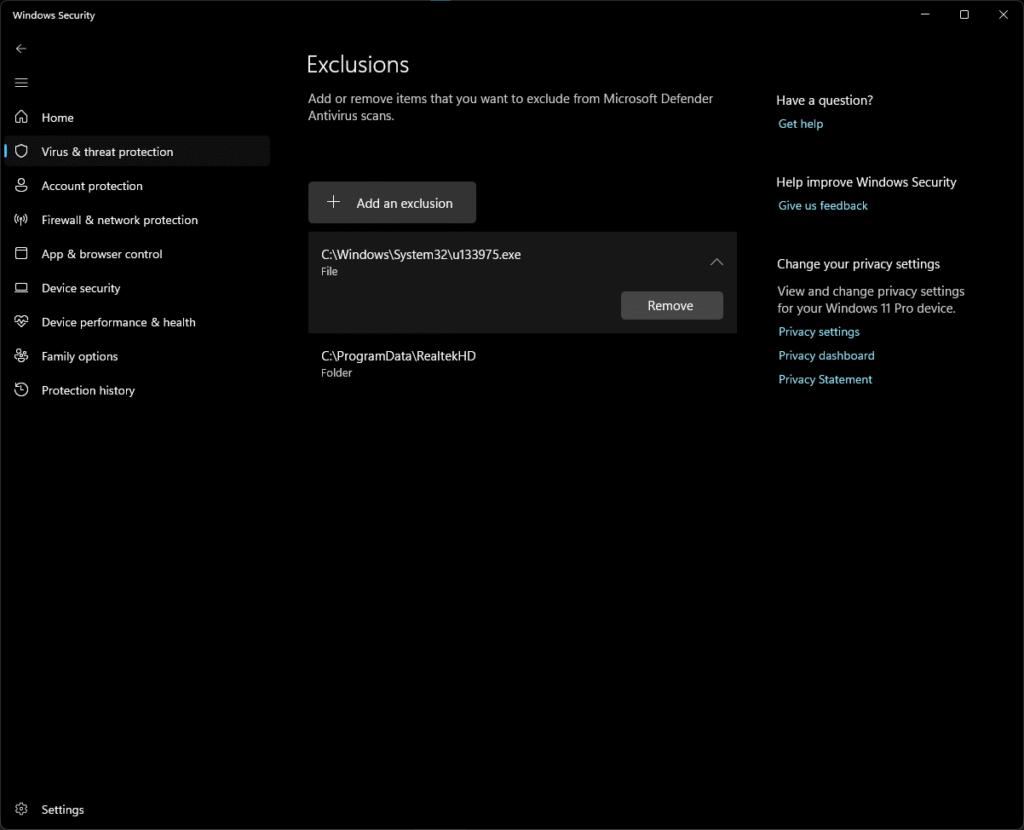
    From this list, you should be able to click any entries you don’t recognize and remove them. This area, by default, is empty

    You’re done!

    -Furtivex

  • How to Turn Off Windows Defender Real-Time Protection

    Here are some facts about Windows Defender with a guide on how to turn off its real-time protection

    Windows Defender is the default antivirus solution for computers running Microsoft Windows 10 and 11.

    You can’t uninstall or remove Windows Defender, but you can disable its real time protection.

    If you install additional antivirus to the computer, Windows Defender will remain dormant on the system.

    Here are the steps to toggle real-time protection:

    Click the Start button / Windows logo on your Taskbar:

    Select Settings:

    Click Privacy & security:

    Click Windows Security:

    Choose Open Windows Security:

    Choose Virus & threat protection:

    Choose Manage Settings:

    Click the bar to toggle between On and Off. Leave it in the OFF position to disable real time protection

    When you are finished cleaning your system or running the software you wish to run without interference, turn Real-time protection back ON

    Hopefully you found this guide useful!

    -Furtivex

  • How to Avoid Unwanted Pop-Ups

    If you have ever been using a browser and suddenly received a pop-up such as this one:

    Close the tab instead of clicking ‘Allow’ or ‘Block’

    If you press “Allow”, you not only add a setting to your browser that you won’t like, but you’ll start to get inundated with notifications (FakeAlerts) such as these:

    Some of these show up in your browser, and some will appear in the bottom-right corner of your screen

    It’s important to note that these are fake alerts designed to scare you into clicking “Install antivirus”, “Proceed..” etc. Essentially, they want you to visit a website of their choosing. Usually they receive some sort of payment for sending you there

    It’s important to be aware of what you click.

    If you need help with removing this type of problem, check out DoesNotBelong as it supports many browsers, except Gecko based browsers (FireFox, WaterFox, Floorp, etc…)

    If you’d like to do this yourself, open your browser (Microsoft Edge, Google Chrome, etc..) and type one of these into the address bar and then press ENTER:

    • edge://settings/content/notifications
    • chrome://settings/content/notifications
    • brave://settings/content/notifications
    • about:preferences#privacy <–Firefox users

    From this page, you should be able to immediately find the offending entry:

    Once you click Remove, the offending pop-ups should immediately disappear if they were active on your screen.

    Afterwards, consider using an adblocker and updating your hosts file. Here is mine if you are interested: Hosts_Adultxxx

    -Furtivex

  • Safe Mode & Safe Mode with Networking

    The scripts are capable of running in Safe Mode and Safe Mode with Networking

    You may wish to utilize this mode if you suspect the system is heavily infected and/or you’re experiencing a lot of lag/CPU spikes while in Normal Mode. It’s almost always faster to start the repair process here, but getting into Safe Mode may seem like a daunting task. But don’t worry, it’s easy! Follow the steps below to enter and exit Safe Mode.

    Note: The Task Scheduler cleaning portion of the scan does not work while in this mode. This is the only downside. Task scheduler is a persistence mechanism for most modern malware. The script will still hunt for and delete all other types of traces on the system. It is recommended to rerun the scan when Normal Mode becomes tenable.

    Here are the instructions to boot your Windows 10 or Windows 11 computer into Safe Mode with Networking

    Type: MSCONFIG

    Press Enter key

    The System Configuration utility appears:

    Click the Boot tab near the top

    In the Boot options area located in the bottom left of the window

    Click Safe Boot

    Click Network

    Click OK

    You’ll have the option to Restart or Exit without restart. Regardless, the next time you boot your PC, it will be in Safe Mode with Networking

    Once you are done with Safe Mode with Networking, use the MSCONFIG once again

    Uncheck Safe Boot

    Click the General tab in the top left area

    Click Normal startup

    Click OK

    Restart Now or Later

  • Research

    Here are some examples of the types of links that are blocked with this hosts file.

    Browser Lock // 01.30.2025

    McAfee Fake Alert // 01.30.2025

    TotalAV Fake Alert // 01.30.2025

    Norton Fake Alert // 01.31.2025

    Potentially Unwanted Software // 01.31.2025

    PushNotif // 01.31.2025

    Fake Dating // 01.31.2025

    McAfee Fake Alert // 01.31.2025

    Potentially Unwanted Software // 02.01.2025

    Password Stealers // 02.02.2025

    Sex ads // 02.11.2025

    McAfee Fake Alert // 02.22.2025

    iOS Fake Alert // 02.25.2025

    Google Safe Browsing Fake Alert // 10.05.2025

    Password Stealers // 10.12.2025